Recently Google has announced that Workspaces will be paid if you want to be able to use the email function of workspaces. So I was looking for some free alternatives and stumbled upon Zoho Mail. I will show you step-by-step how to set up Zoho Mail with your own domain.
Psst! Need a new domain? Try Namecheap
Side Note: a while back I wrote about how to Use Gmail with your own domain for free. That method was utilising Mailgun and creating a free @gmail.com email and it is a bit more technical than some would want
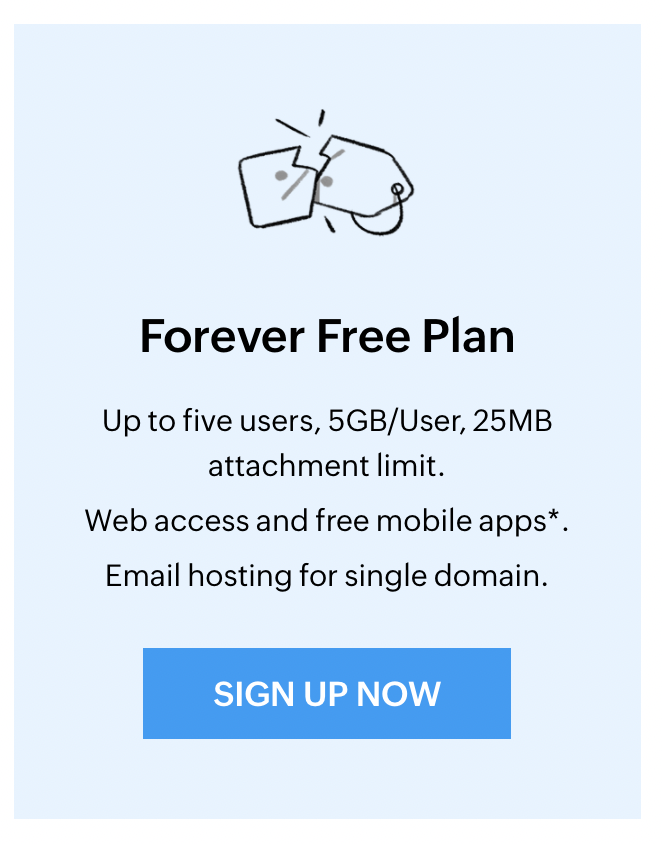
Zoho Mail is part of Zoho Workplace suite and while there are paid plans for standalone email and Workplace, there is also a “Forever Free Plan” for email service only
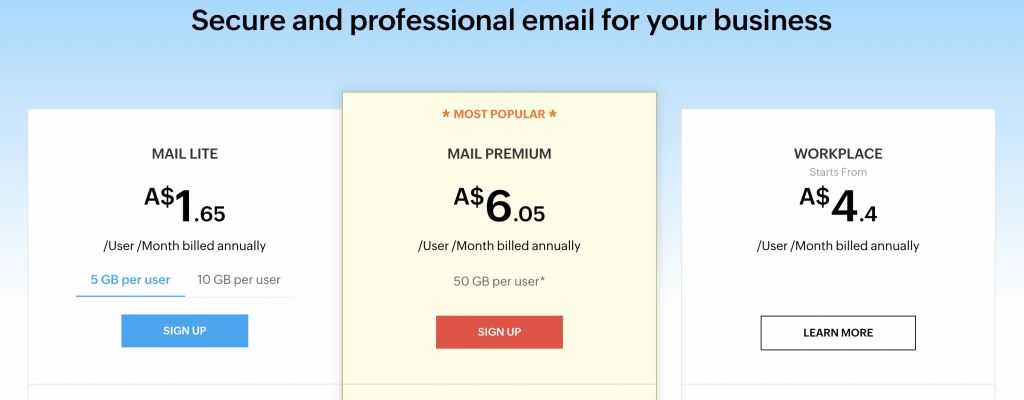
Here is a brief comparisons of the plans, more details here.
| Forever Free | Mail Lite A$1.65 /A$2.20 | Mail Premium A$6.05 | Workplace Standard A$4.40 | Workplace Professional A$9.35 | |
|---|---|---|---|---|---|
| Email Hosting | 1 domain | Unlimiited Domains | Unlimiited Domains | Unlimiited Domains | Unlimiited Domains |
| Mail Storage Per User | 5GB | 5GB/10GB | 30GB | 30GB | 100GB |
| Attachment limit (Mail) | 25MB | 30MB | 40MB | 30MB | 40MB |
| Huge Attachment Limit (Mail) | up to 250 MB | up to 1 GB | up to 500 MB | up to 1 GB | |
| Zoho Calendar | V | V | V | V | V |
| Zoho WorkDrive | X | X | X | V | V |
| Zoho Office Suite (Writer, Sheet, Show) | X | X | X | V | V |
| Zoho Click | V | V | V | V | V |
| Zoho Meeting | X | X | X | Up to 10 participants | Up to 100 participants |
| Zoho Connect | X | X | X | X | V |
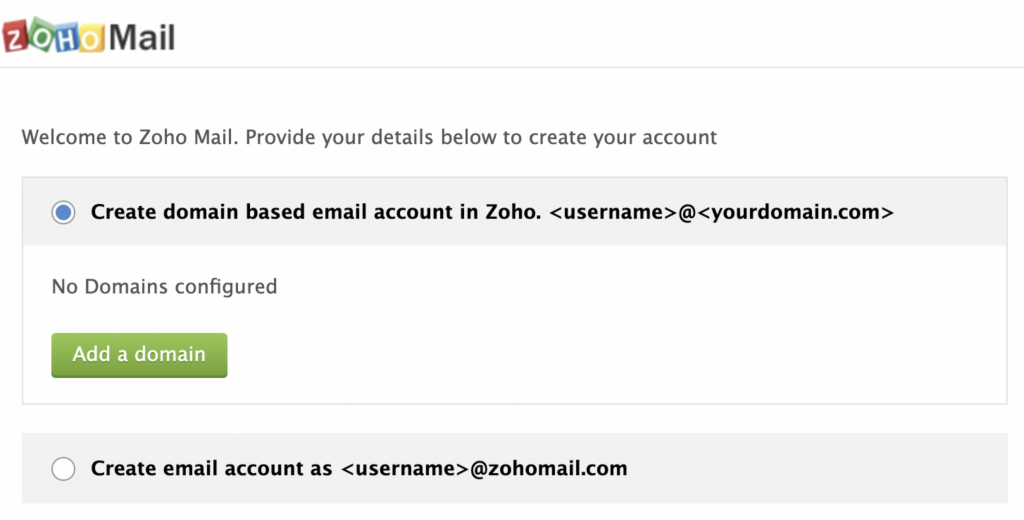
Creating Zoho account
Browse to Zoho Mail Pricing page and choose the applicable plan.
If you are interested in the free one, then scroll down and select the “Forever Free Plan”
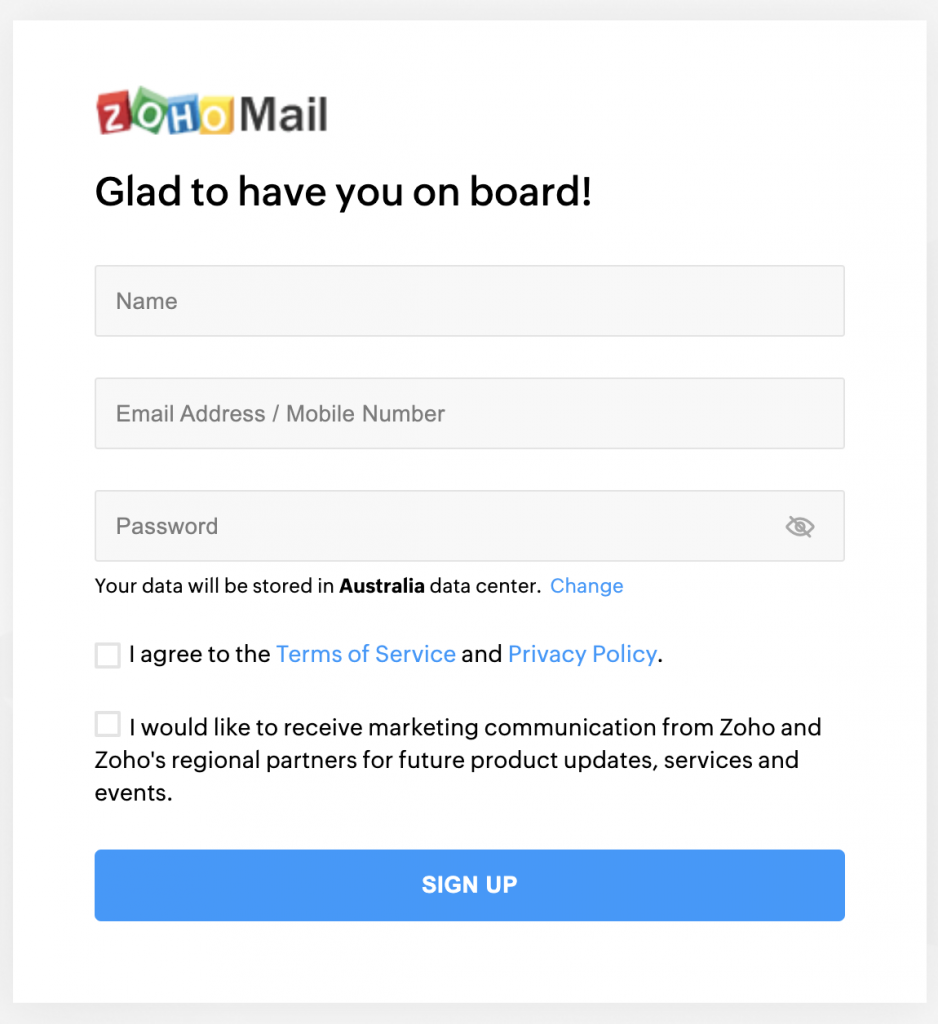
Fill in your details on the following page to create a Zoho account.
After the signup process is complete you can continue with setting up Zoho Mail account
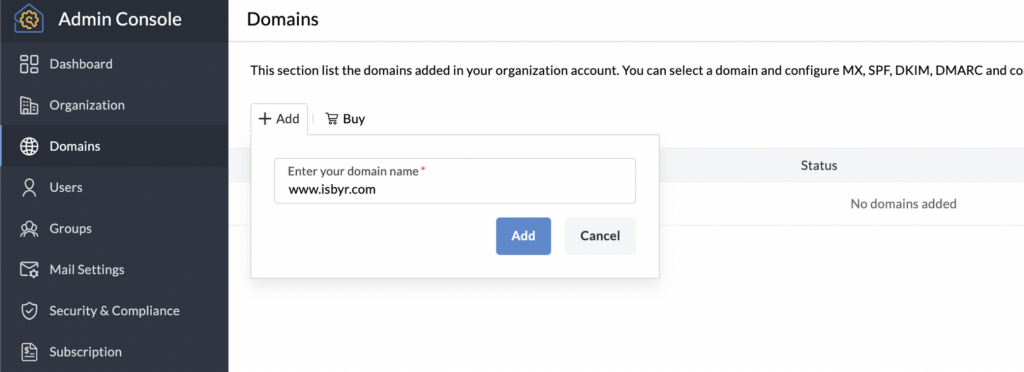
Setting up Zoho Mail
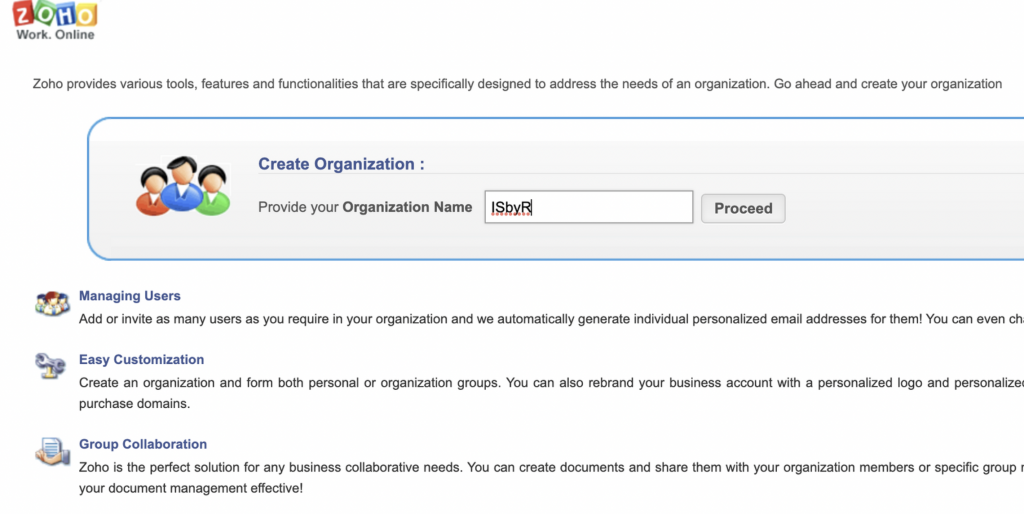
Navigate to Zoho Mail Admin Console,
Create an Organization
Add a new Domain
Enter your domain name
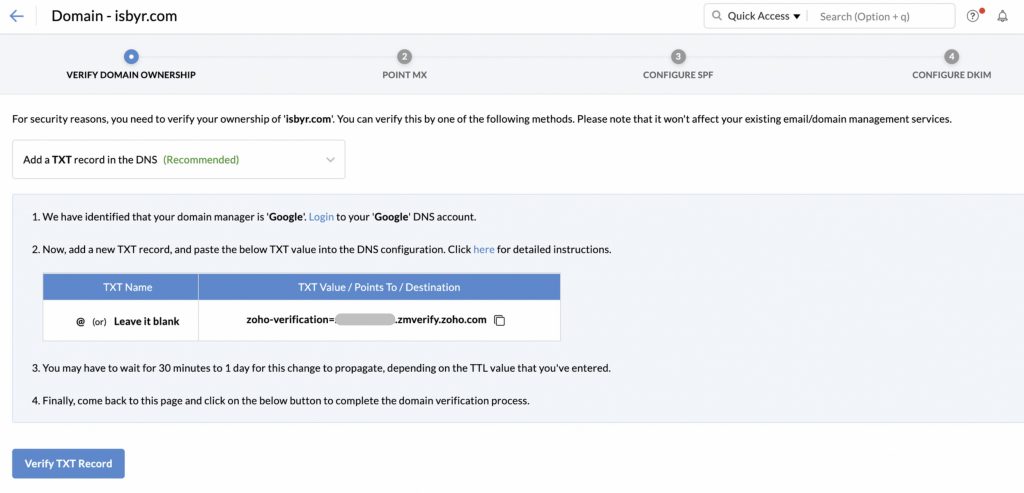
Now to the “fun” part!
In order for Zoho to be able to Receive and Send email using your domain you will need to set DNS records with your hosting or your DNS provider. I must say that this process was very well guided an it has links to detailed guides based if you are with one of the major hosting/DNS providers. The screenshots in the next steps are from Google Cloud Platform (GCP) since I use it as my DNS provider.
Setting TXT DNS record to prove ownership of your domain
In GCP navigate to Networking > Network services > Cloud DNS and select your domain
Click ADD RECORD SET
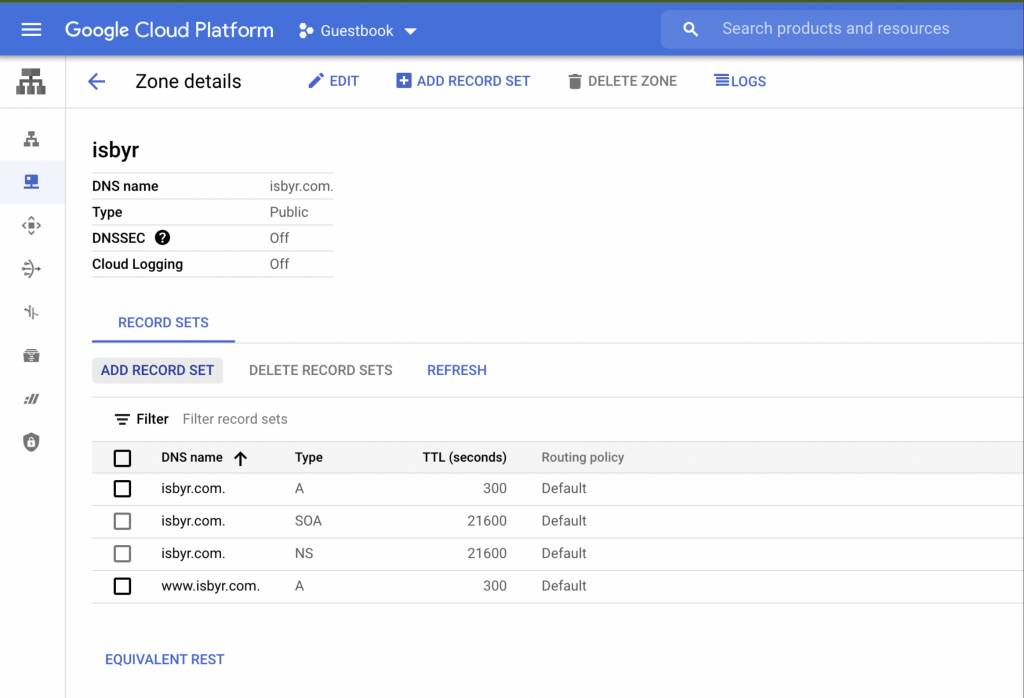
Create the TXT record using TXT data copied from Zoho Mail.
Leave TXT name blank (I was trying it with @ but it didn’t work for me)
Set TTL for 3600 seconds
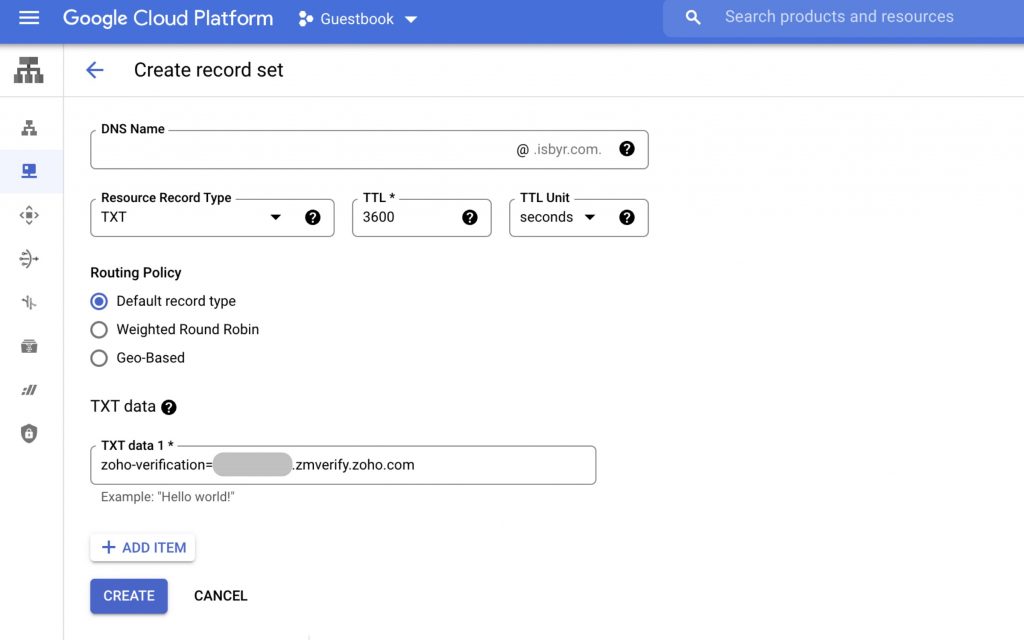
If everything was done correctly, when you click Verify TXT Record in Zoho mail wizard you will be able to proceed
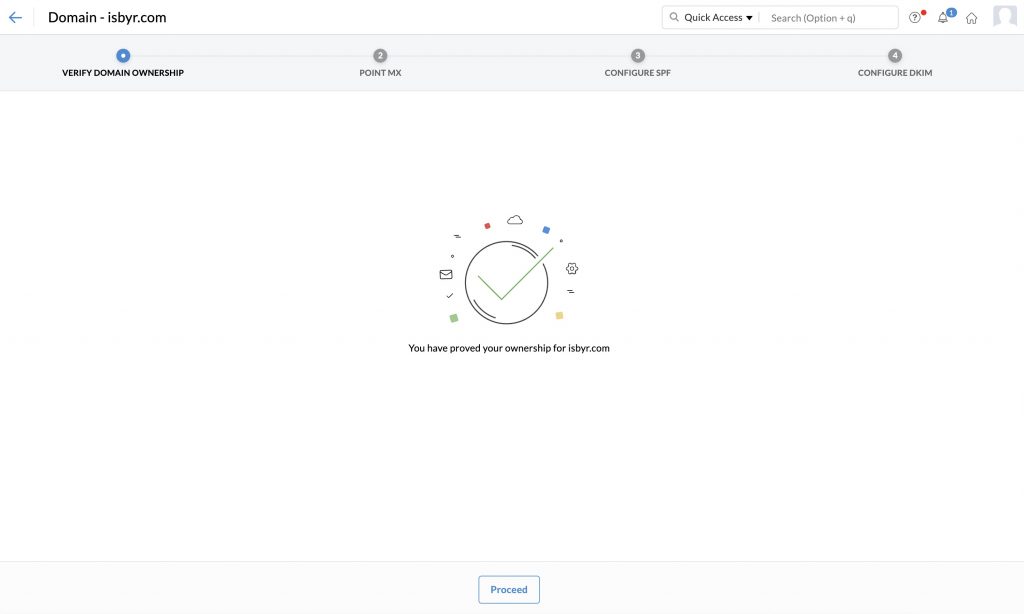
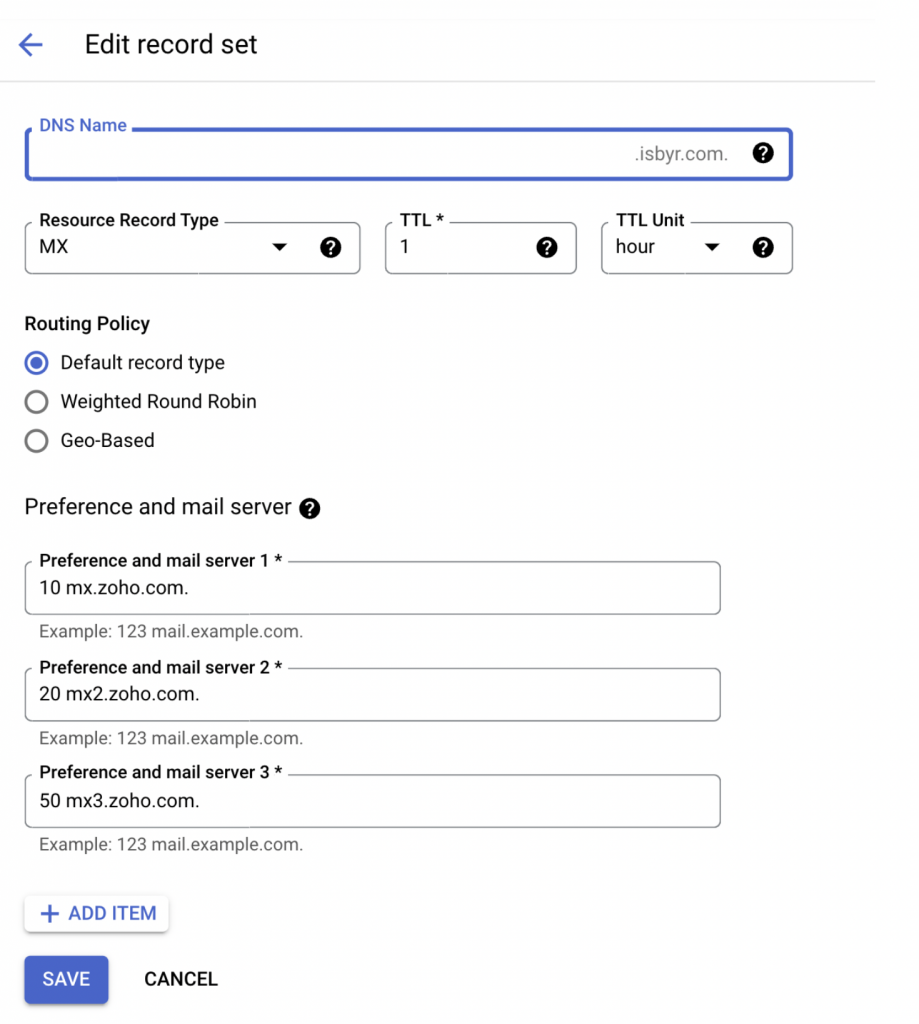
Set the remaining required DNS records
Next setup MX Records
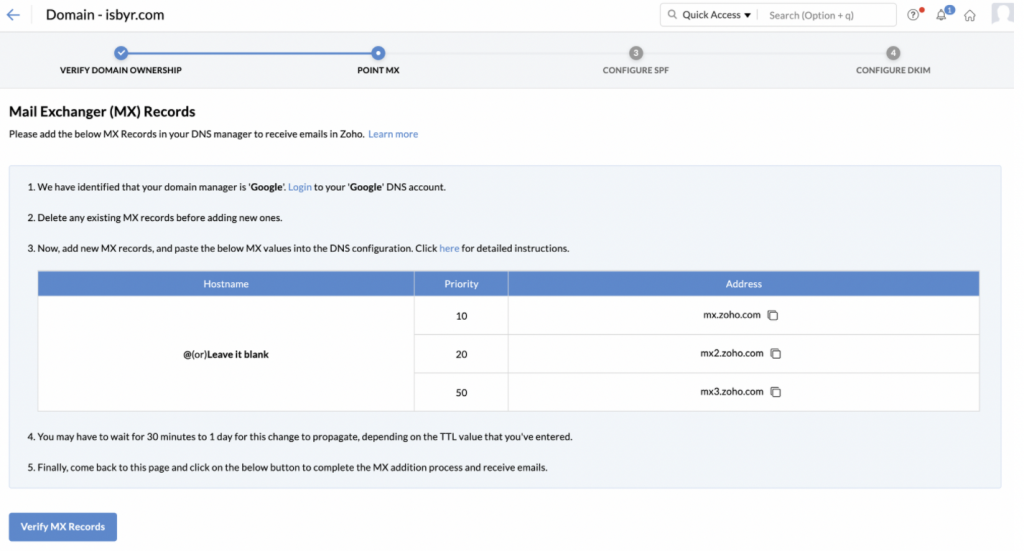
SPF record and another TXT record for DKIM.
Now you are it’s time to configure users and start sending emails!!
Configure Users and Aliases
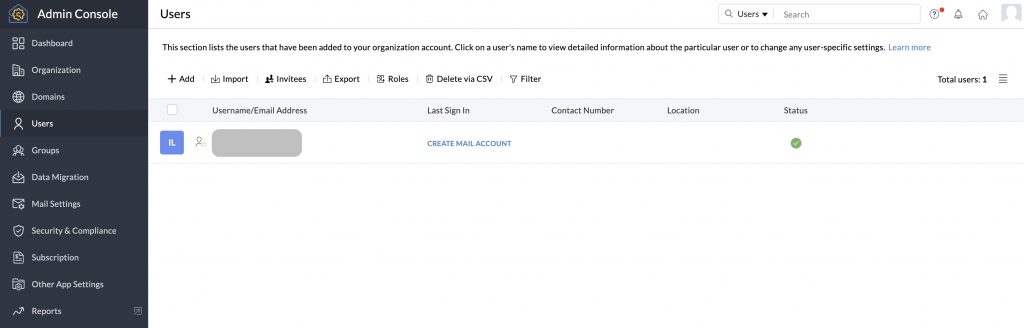
In Zoho Mail Admin Console navigate to Users and click CREATE MAIL ACCOUNT for your user.
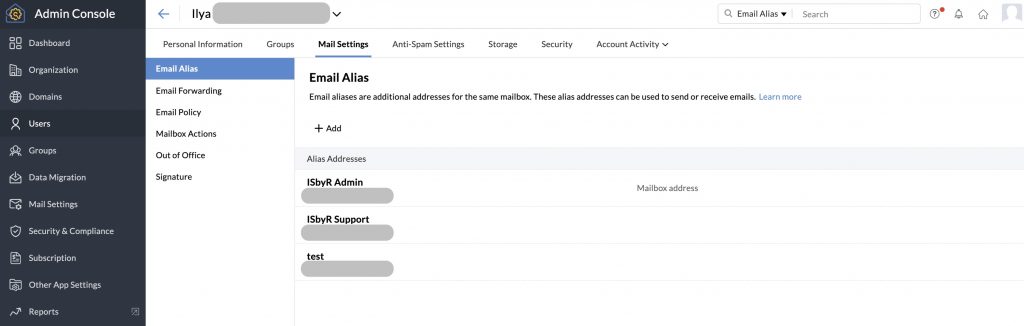
While you are there (or later) you can also setup Aliases for your User under Mail Settings > Email Alias
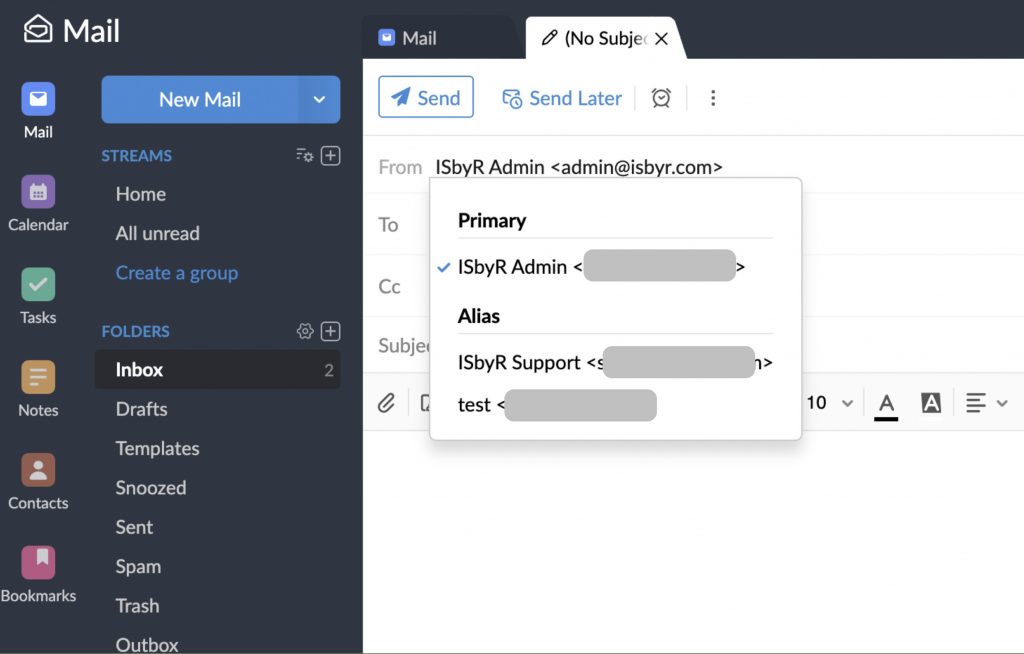
Sending and Receiving emails with your domain for free with Zoho Mail
Now you can send emails using any of the defined aliases
We may earn a referral fee for some of the services we recommend on this post/website.
2 thoughts on “How to set up Zoho Mail with your own domain”